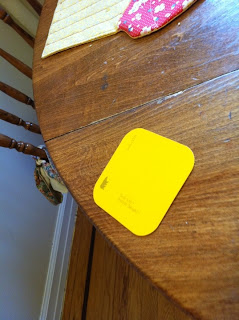
Painting our kitchen table was by far the largest and most involved project we've undertaken. Seriously. I was at it for a month. The month of July. In the one room in our apartment without air conditioning.
I am extremely proud of the result, even if I point out every single imperfection in it. It truly brightened up our kitchen and turned a hand me down into something of our own.
I have to thank this fabulous step-by-step guide from the DIY geniuses at Young House Love for their know-how and ability to break things down into digestible pieces. And for providing the names of the exact products they used.
Here's the before and after:
 |
| Before (seriously, right before). |
 |
| After (with cupcake place mats made special for our wedding)! |
And now for the process...
Step One:
Read your instructions a thousand times so you have them memorized.
Step Two:
Purchase materials. Photograph them.
 |
| The lineup. |
 |
| Paint color: Behr "Instant Delight." |
Step Three:
Sand to remove the finish (not the stain) and create a rough surface for the primer and paint to stick to.
 |
| Not pictured: The side of a leaf that Husband sanded, which comprises all the work he did on this project. (He was taking a summer class.) |
 |
| The close up I sent to my daddy for approval. |
Step Four:
Prime!
A few notes about oil-based primer:
- It needs to be shaken like the dickens. I did not shake it (I stirred it, and Home Depot had failed to give me a paint stirrer, so I improvised with first a skewer [failure] and then the handle of an old paint brush [better]). When I later shook it to prime the tops of the leaves (I did the bottoms first since I didn't care if they got mucked up) I got a totally different result. As in, they were properly primed, unlike this photo shows.
- It is extremely difficult to dispose of. As soon as I opened it, Husband began researching how to dispose of it. And got really scared. Oil-based primer isn't recommended for use since it's so darn bad for you, so it's really hard to get rid of, especially in NYC. We ended up bringing it to a local hardware store that said they would take care of it for us. We really don't know where it ended up. Ignorance is bliss. Young House Love recommended oil-based primer because it makes the finished product extremely stain resistant and creates a great base for you paint, but if I did it all over again I would use a latex paint with the primer mixed in and let the clear gloss do the hard work of stain-proofing it. It would have saved me steps (and at least a week without a kitchen) and a few gray hairs.
Step Five:
Paint until your painting gets so messy you should really quit.
Those lovely turned legs were my downfall. I only put two coats on them, while I put three coats on all top surfaces of the table.
Step Six:
Spend a lot of time comparing the color to Velveeta. Call it your macaroni and cheese table. Take this picture for amusement:
Step Seven:
Coat with clear gloss. I didn't photograph this process. I had a hard enough time doing it, as the light wasn't in my favor at the time and I couldn't tell where I had missed spots. I have meant to go back and patch the places I missed, but haven't gotten around to it yet.
Step Eight:
Celebrate, because you have a kitchen again! Because I could only work on it on the weekend, this whole process took over a month, meaning we ate dinner either out or in front of the TV for a month. Husband was thrilled to have the table again, although he refused to put objects directly on it for a few weeks.
Here are a few beauty shots.
 |
| Covered in Greek food (aka: its usual state). |
 |
| Here is where I brag that I have a fully-functioning eat-in kitchen in an NYC apartment. |
There you have it! It was a challenging process, but I'm really pleased with the result. Doing it in the heat and humidity of July and August was not my wisest choice, but I don't always make good decisions. Once we reorganize the kitchen and buy new chairs and maybe a rug, it will be an even more inviting space!


No comments:
Post a Comment